
Installation tips of Rainbow Vinyl Wrap | Vinyl Wrap Shop
Installation Tips for Rainbow Vinyl Wrap
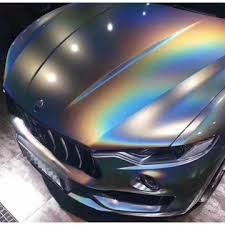
Rainbow Vinyl Wrap are a popular choice for vehicle customization, offering a sleek and luxurious finish that enhances the overall aesthetic of your car. Whether you're a professional installer or a DIY enthusiast, proper installation is key to achieving a flawless look. Here are some essential tips to help you install Rainbow Vinyl Wrap effectively and efficiently.
1. Prepare Your Surface
Before applying the vinyl wrap, ensure that the surface of your vehicle is clean and smooth. Wash the car thoroughly to remove dirt, grease, and debris. Use isopropyl alcohol to wipe down the surface, eliminating any residues that could interfere with adhesion. Inspect for imperfections like scratches or dents, as these can show through the wrap. Address these issues beforehand for a seamless finish.
2. Gather the Right Tools
Having the proper tools on hand can make the installation process smoother. Essential tools include:
- A heat gun or hairdryer for stretching and forming the vinyl
- A squeegee for smoothing out air bubbles
- A sharp utility knife for precise cutting
- Gloves to prevent fingerprints on the adhesive side of the wrap
Investing in high-quality tools will save time and ensure better results.
3. Measure and Cut Carefully
Measure the area you plan to wrap and cut the vinyl with a slight margin for error. It's better to have excess material that can be trimmed later than to come up short. Lay the vinyl flat and avoid creasing it during handling.
4. Work in Sections
Rather than attempting to wrap the entire vehicle at once, work in manageable sections. Start with smaller, flat surfaces before moving on to more complex areas like curves or edges. Peel back the adhesive liner gradually as you apply the wrap to maintain control and reduce the risk of air bubbles.
5. Use Heat Strategically
Rainbow Vinyl Wrap are pliable when heated, making it easier to conform them to complex shapes and contours. Use a heat gun to warm the material slightly, allowing it to stretch and adhere smoothly. Be cautious not to overheat, as this can damage the vinyl or cause discoloration.
6. Smooth Out Air Bubbles
Air bubbles are a common challenge during vinyl wrap installation. Use a squeegee to press out any trapped air, starting from the center and working outward toward the edges. For stubborn bubbles, use a pin to release the air and smooth over the area gently.
7. Trim and Tuck Edges
Once the vinyl is applied, trim any excess material with a sharp utility knife. Tuck the edges neatly around corners, seams, and panels for a polished look. Double-check that all edges are securely adhered to prevent peeling over time.(Black Vinyl Wrap)
8. Post-Installation Care
After installation, allow the vinyl wrap to set for at least 24 hours before washing or exposing it to harsh conditions. Regular maintenance, such as gentle hand washing with non-abrasive cleaners, will help preserve the wrap's appearance and longevity.
By following these tips, you can achieve a professional-grade finish with your bronze vinyl wrap. Take your time, stay patient, and enjoy transforming your vehicle into a head-turning masterpiece!